
DIY Stamps!
Today I'm going to show you a very simple way to make your own stamps! This is also a great project for kids (as long as an adult handles the x-acto knife!), and it's a good way to make use for all those pink erasers found lying around the house!
Materials:
 |
| pen or sharpie, x-acto knife, pink eraser, stamp pad |
Once you have all your materials together, start by choosing a design to fit on the eraser and draw it on. Try to keep it as uncomplicated a design as possible, unless you're up to the challenge. And remember, if you are doing letters, DRAW THEM BACKWARDS on the eraser...
Like this:

From there, take the x-acto knife and start cutting. You will want to begin by pressing the x-acto knife down through the eraser about 1/4 of the way, then use it to free up the underside so you can detach the part you just cut off.

It may not end up being the prettiest stamp in the word, but it does the job.

Also, if you're doing letters, don't forget to cut out those little circles, like mine in the "O" and "P". (Although i gouged my "P" a bit by accident. *sadface*) And BE CAREFUL with that x-acto knife!
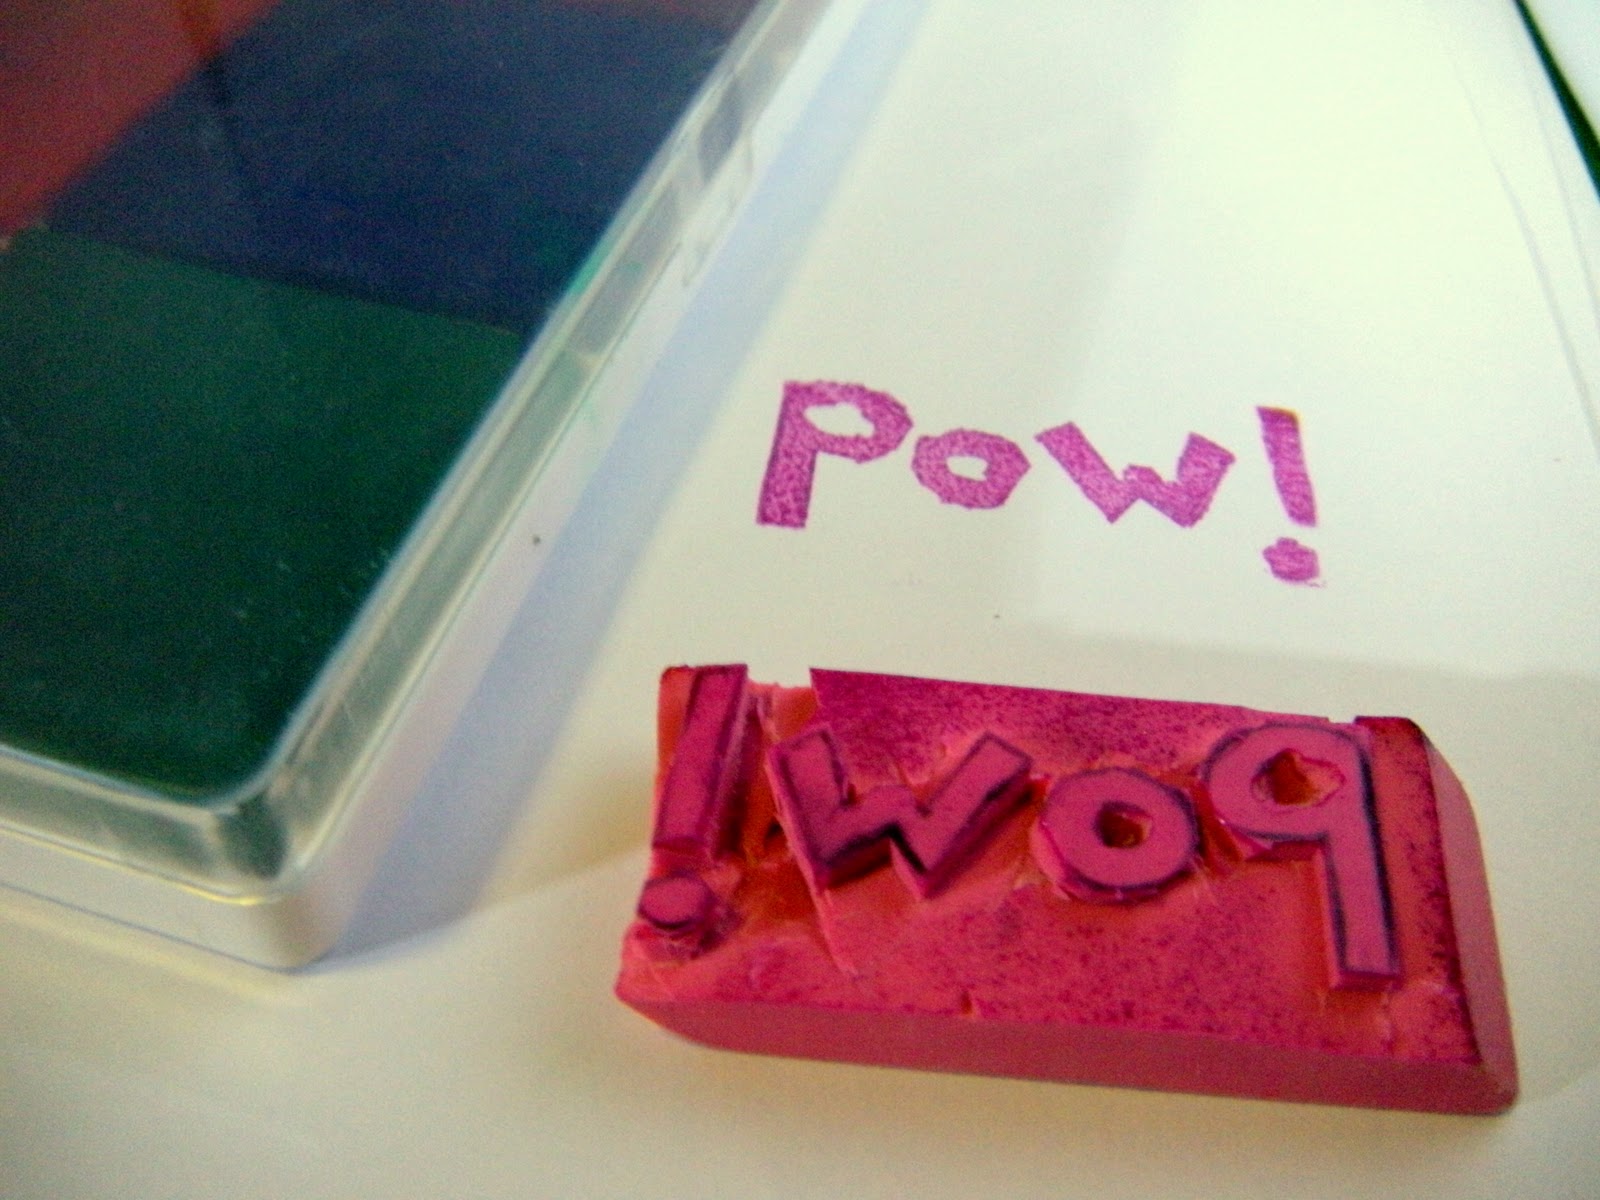
Once you're done, test it out on your stamp pad! I made 4 total, and I love how they turned out!

Have fun creating some unique stamps of your own!!
No comments:
Post a Comment