The fishtail braid trend is IN right now, I keep seeing the fishtail braids in hair ALL OVER PINTEREST, and since I have absolutely no dexterity when it comes to doing my hair, I figured these bracelets would be a cute way to rock the fishtail look instead!
Fishtail Friendship Bracelets
What you will need:
- At least 6 strands of of braiding cord/embroidery thread/hemp, each cut to 3 ft. long. (If you are using embroidery thread, I would suggest using 9 strands. The method will still be the same, though, don't worry!)
- Scissors
- Tape (To hold down the end of the bracelet while you are braiding it.)
- An end bead.
Cut your 6 strands of cord to be 3 ft each.
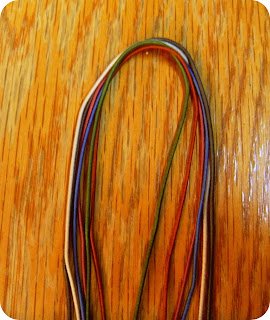
Once your strands of cord are cut, make sure the ends of the cord are even, then grab both ends of the group of cords and fold them over so that you can find the middle.
From here, twist this middle section like this:
Loop the twisted section over your index finger, and knot it twice, forming a loop (this will end up being the loop that your end bead while slide into when you're finished).
 |
| apologies for the blurry photo. whoops! |
Anywho, when it's knotted twice it should look like this:
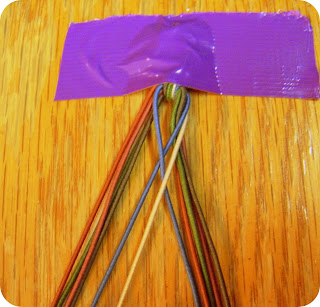
Tape your loop down to a tabletop or something sturdy and heavy so it can be held in place while you braid. I have it taped to the top of the table in this picture, but I find it is more comfortable and easier to tape it to the edge of the table, so that it is hanging down, as you will see later in this tutorial.
Start your braid by separating the two sections of cord (the knot kind of does this job for you), and pulling a piece from the outside of the right group and crossing it over to the left group like this:
Then, find the matching color strand on the left group, and cross it over to the right side like this:
Pull tight, then repeat on the next strand. Pull from the outside of the right group over to the left group, and then pull the matching color from the left group over to the right.
Continue doing this with each strand... don't worry if it looks a little weird and messy in the beginning, it comes together after you get through one cycle of colors and start over with the first color again.
Here's what it should look like after the first cycle of colors:
From here, it gets easier, just keep following this same pattern over and over again until you have it at the desired length for your wrist.
When you have it at the length you want it, twist both groups of strands in towards each other a couple times, and knot them together twice, to keep the braid tight and secure.
Then, take your end bead (which should be big enough to fit over all of the strands and through the loop on the other end of the bracelet), slide it over the loose strands, and knot it two more times on the other side of the bead, securing the bead on the bracelet.
That's it! Enjoy!
If you have any questions, feel free to leave me a comment or email me at Quirkability@gmail.com!
While I have you here, I wanted to show you a couple shoe makovers I did with spray paint earlier this week... (Remember, if you decide to use spray paint, do it in a WELL-VENTILATED AREA and wear latex gloves.)
This pair was a scuffed up old pair of black flats from Old Navy that have been in retirement at the bottom of my shoe bin in our closet. Apologies for not taking "before" pictures, it only occured to me AFTER I re-did the shoes to take pictures. *facepalm*.
Anyway, for this pair, i simply put paper towels inside the shoe to protect it (although I didn't do a great job, because i still got some paint on the toe. Whoops!) Then I sprayed turquoise spray paint all over the outside of the shoe and let them air dry. I love how the faux snakeskin pattern shows through even with the turquoise paint!
For the second pair, I used an old pair of never-been-worn plain black shoes that were given to me several months ago and have been sitting with the other flats in the bottom of my shoe bin.
I used duct tape and taped off stripes on the shoes, making sure to match the stripes on the opposite shoe. Then, I stuffed paper towels in the shoe to protect the inside, and spray painted them bright yellow!
I've got to say, these are by far my new favorite shoes, and the best part is, since I had all the materials on hand, it didn't cost me a dime!
Breathe new life into your old shoes!
For more shoe re-do ideas, check out my GLITTER SHOES TUTORIAL.
Have fun! We are leaving for Iowa in the morning, and spending the weekend with friends, but I will be back in action for Music Monday!
xoxo, Meagan.


Thanks for the tutorial!
ReplyDelete